Introduction
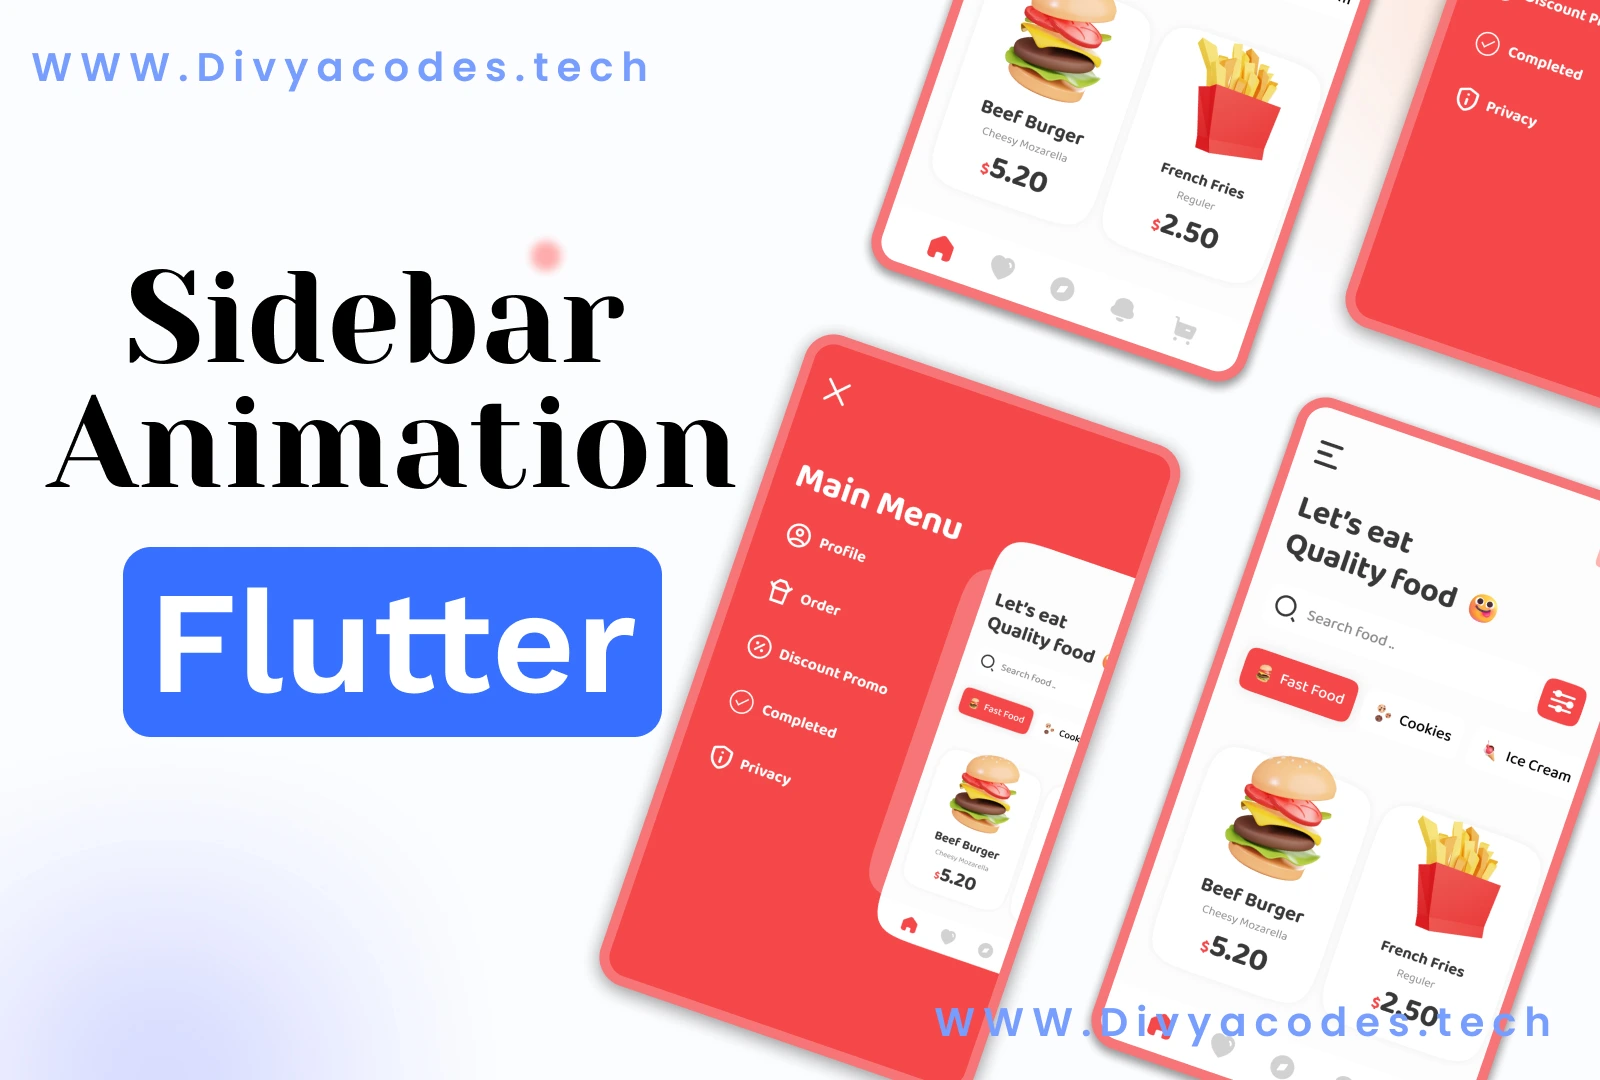
Looking to add a modern, animated sidebar menu in your Flutter app? 🪄
The flutter_zoom_drawer package lets you create a stylish zoom drawer animation for your sidebar, enhancing navigation and user experience with smooth, interactive transitions.
In this guide, you will learn step-by-step how to implement a sidebar animation menu in Flutter using flutter_zoom_drawer.
What is flutter_zoom_drawer?
flutter_zoom_drawer is a Flutter package that allows you to easily create a side menu with zoom, scale, and parallax effects.
It provides:
✅ Clean animations
✅ Easy integration
✅ Multiple customization options for colors, curves, shadows, and more.
Why Use an Animated Sidebar Menu?
- Enhances user experience with smooth transitions.
- Provides clean navigation in your app.
- Improves app structure without complex code.
Step 1: Install the flutter_zoom_drawer Package
Add this to your pubspec.yaml:
dependencies:
  flutter_zoom_drawer: ^3.1.1
Then run:
flutter pub get
Step 2: Create Your MainScreen and MenuScreen
These represent:
- MainScreen: Your main app content.
- MenuScreen: Your sidebar menu.
Example:
// main_screen.dart
import 'package:flutter/material.dart';

class MainScreen extends StatelessWidget {
  @override
  Widget build(BuildContext context) {
    return Scaffold(
      appBar: AppBar(title: Text('Main Screen')),
      body: Center(child: Text('Main Content Here')),
    );
  }
}
// menu_screen.dart
import 'package:flutter/material.dart';

class MenuScreen extends StatelessWidget {
  @override
  Widget build(BuildContext context) {
    return Scaffold(
      backgroundColor: Colors.redAccent,
      body: Center(
        child: Text('Menu', style: TextStyle(color: Colors.white, fontSize: 24)),
      ),
    );
  }
}
Step 3: Create the ZoomDrawerScreen
This is where you integrate the ZoomDrawer:
import 'package:flutter/material.dart';
import 'package:flutter_zoom_drawer/flutter_zoom_drawer.dart';
import 'main_screen.dart';
import 'menu_screen.dart';

class ZoomDrawerScreen extends StatelessWidget {
  @override
  Widget build(BuildContext context) {
    return ZoomDrawer(
      style: DrawerStyle.style3,
      menuScreen: MenuScreen(),
      mainScreen: MainScreen(),
      borderRadius: 24.0,
      showShadow: true,
      angle: 0.0,
      menuBackgroundColor: Colors.redAccent,
      openCurve: Curves.fastOutSlowIn,
      closeCurve: Curves.bounceIn,
    );
  }
}
Step 4: Use It in Your main.dart
import 'package:flutter/material.dart';
import 'zoom_drawer_screen.dart';

void main() {
  runApp(MaterialApp(
    debugShowCheckedModeBanner: false,
    home: ZoomDrawerScreen(),
  ));
}
Customization Options You Can Use:
✅ borderRadius: Rounded corners on the main screen when open.
✅ showShadow: Enable/disable shadows for depth.
✅ angle: Tilt of the main screen during animation.
✅ menuBackgroundColor: Background color of your menu.
✅ openCurve & closeCurve: Control animation styles.
Result:
✅ A clean, animated sidebar that:
- Opens smoothly with zoom animation.
- Closes with a bounce for a delightful feel.
- Gives your Flutter app a professional look.
Why Developers Love flutter_zoom_drawer:
✅ Easy to set up.
✅ Highly customizable.
✅ Enhances navigation cleanly.
✅ Compatible with nested navigators and controllers for advanced apps.
Final Thoughts
Adding an animated sidebar using flutter_zoom_drawer not only improves your app’s navigation experience but also makes it visually appealing with minimal effort.
By following the steps above, you now have a fully working sidebar animation menu in Flutter.
You can further enhance it by adding:
✅ Profile info in MenuScreen.
✅ Navigation to different screens from the sidebar.
✅ Theme matching colors for your brand.